TINEYhouse - Aug 2020
The brief...
March 2020 was the start of a sustained lockdown termed "circuit breaker" in Singapore due to the COVID situation and working from home became the default. I thought - why not seize the chance when stuck at home to use up all my weekday evenings and weekends to work on this dream I have had for the longest time : making my own tiny house.
Having recently gone down the Youtube rabbit hole of tiny house listings and all the space saving inventions/furniture, I was bursting with ideas of all the space saving miniature furniture to decorate my mini house with.
In fact, I had purchased some knick knacks (wallpaper stickers, wooden planks) a many years back during a trip to an art store in Taipei.
Thus began the long, tiring but extremely fulfilling journey towards building my house from scratch with balsa wood planks (shoutout to Shopee), loads of superglue, my handy craft knife that broke halfway ): , my utility knife replacements, some acrylic sheets from previous projects and lots of acrylic paint.
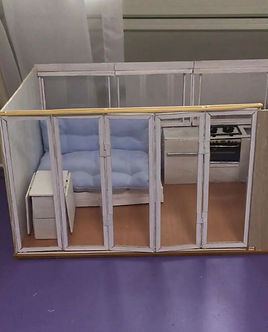
It has been a long journey, but I am EXTREMELY PLEASED with how it turned out and all the space saving furniture as well.

Working sliding doors
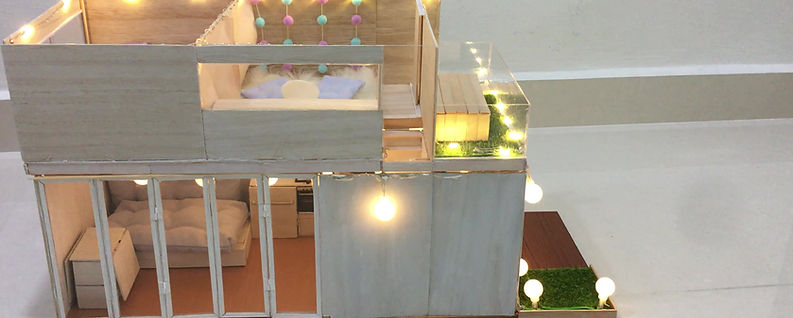
2nd floor balcony
2nd floor bedroom
2nd floor chill corner

Outdoor patio bar
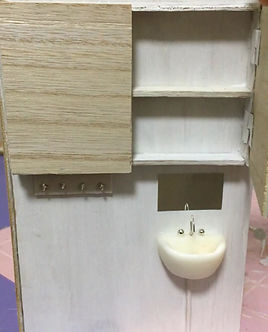
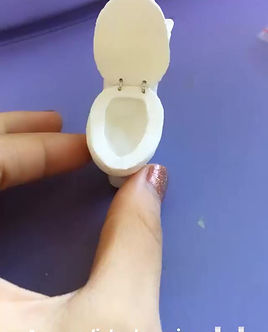
Toilet
Stairs and closet under stairs
Extendable table + stools
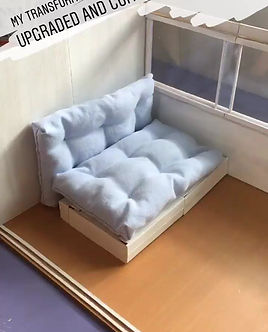
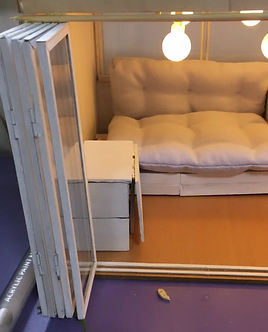
Extendable Sofa bed
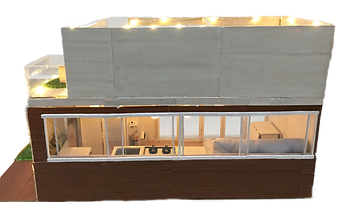
Back view
The process...
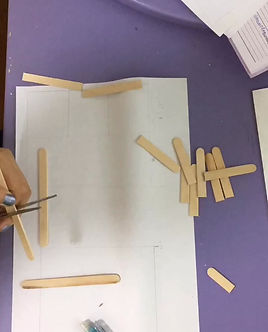
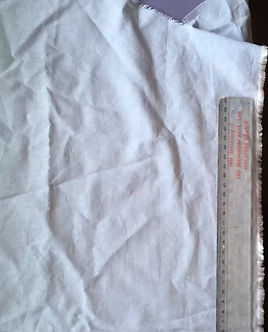
The first thing I started building was the extendable sofa bed! I made the framework out of popsicle sticks and sewed up the cushions. I was so happy with the result as the sofa bed really did function well!
Building the scaffold
The final product
Sewing the bedding
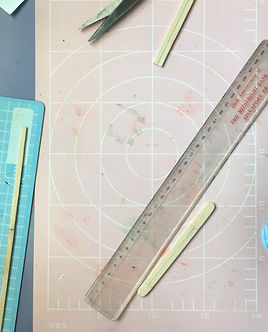
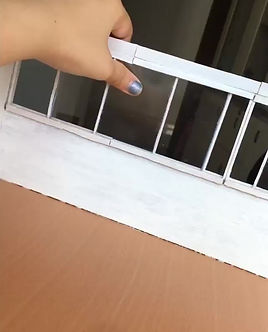
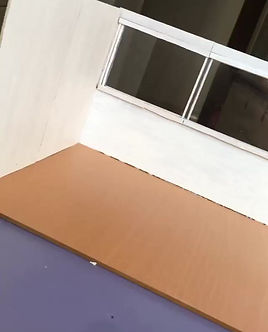
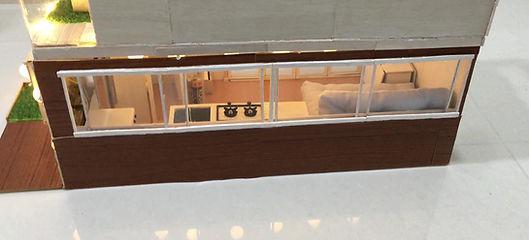
The next step was to build the frame of the house - I covered a large wooden plank that I bought from Taipei a few years back with wood wallpaper sheets for the flooring. Then I sawed off a long piece of wood and painted it white, using it as the base for the sliding windows. As I wanted a house full of natural lighting, I envision a whole panel of sliding windows across the length of the house, and sliding doors on the other side of the house. These windows were actually redone once! Initially I made them with flimsy transparent plastic sheets, but these soon broke down when trying to glue the framework in place - they were too flimsy to be easily opened and closed! So after a few days of brooding to get over my sadness of the failed windows, I made a new set of windows out of sturdy acrylic sheets that worked extremely well!
Making of the first (failed )windows
Sliding windows in action!
Full scaffold with the windows
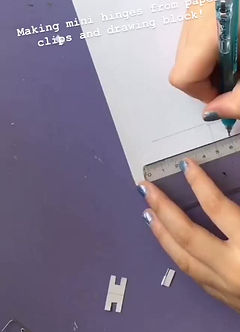
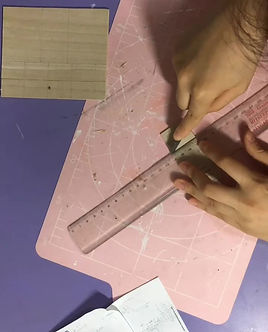
The next up to build was the sliding doors! This took a lot of brain work to figure out the ways the hinges had to be placed for the doors to fold properly (#notanengineer) and I had to also make all the hinges myself too - from hard paper and metal paper clips. It took a while but I was so so proud of the final result!!!!!!!!!!
Making the individual panels

Sliding windows in action!
Adding the hinges to the panels

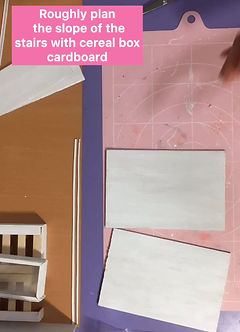
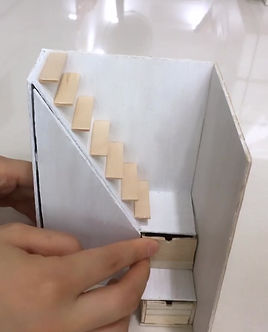
After setting up the sliding door mechanisms, I decided to make the stairs and the under the stairs closet! (inspired by all the tinyhouse videos). The stairs has a full closet, and drawers underneath!
Making of the closet/steps!
The drawers
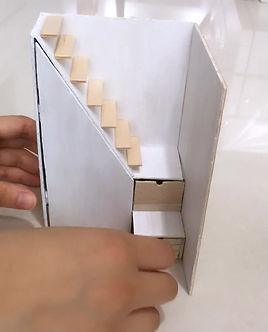
The closet!
At this point, it is well into the circuit breaker period and shopping on ezbuy is a thing. Somehow I chanced upon this SUPER COOL foldable table that unfolds and even has 4 stools packed neatly into it! So I set about making it in miniature.
Making of paper hinges
The avengers table in mini!!

Making of the table
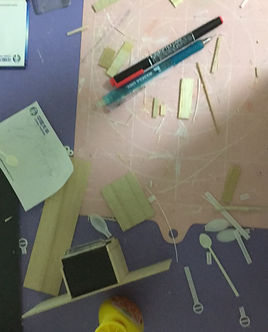
Next up was to make the toilet, shower, and sliding doors to the toilet!
Making of the shower stall
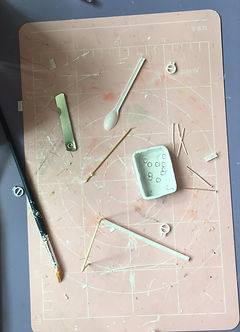
Toilet cabinet and sink!
Toilet bowl made from clay!
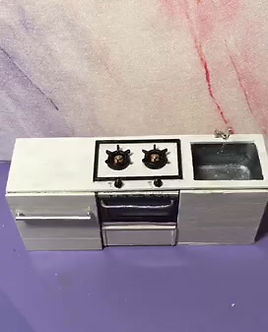
Next up was to make the kitchen counter! I always wanted an extendable kitchen counter kinda thing, and experimented very long with the sliding mechanisms for the extendable panels like they have in real life. After 5 failed attempts of the sliding mechanism (sad reacts only) I decided to shelve that idea and use a different type of extension instead ): ONE DAY!! I WILL BE ABLE TO MAKE THE SLIDE EXTENSIONS IN MINIATURE, ONE DAY.
One of the many failed sliding extensions ):
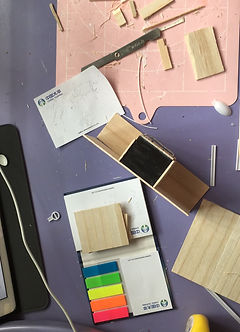
Kitchen counter overview
One of the many failed sliding extensions ):
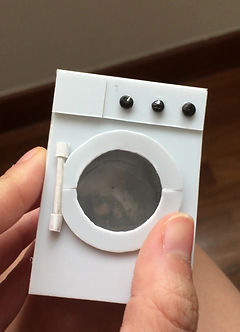
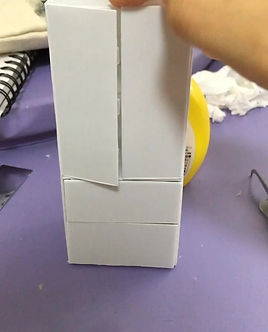
Next up: The other furniture of the fridge and washing machine! At this point I have returned to working onsite so traction was greatly reduced and I stopped filming most of the making processes.
Washing machine
The fridge with lights!!
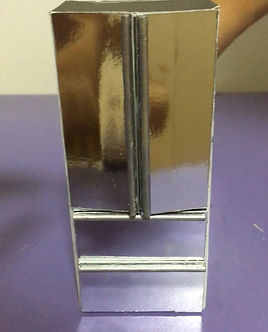
Fridge before wrapping and lighting
Next up: Setting up the sliding doors, 1st floor lighting and 2nd floor scaffold!
Setting up sliding doors
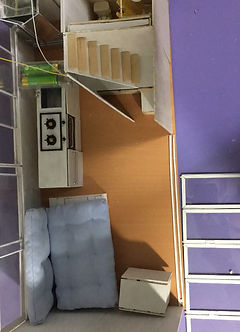
1st floor wiring
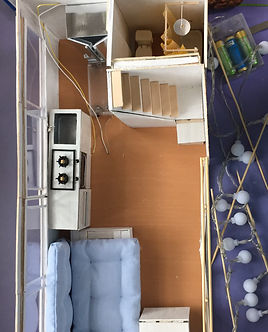
Making 2nd floor scaffold

Next up was to just furnish the 2nd floor, with the bed, table, curtains, the balcony and wire it all up!
View from the 1st floor sliding windows
Full house view + outdoor foldable murphy bar made on the last few days!
And thats it for the house!!! It has been a longgggg journey with alot of effort put in!! I made all furniture and even hinges from scratch, so it is well time to rest!!!
Worked on this house here and there during 6 months while still working - it is time to call it a day (: Till next time!